
When we use LED strip lights to make products, we often need to cut the strips according to our customer and internal requirements. This could be due to varying voltages, different styles of LED strip uses, or bespoke cutting methods. Understanding how to correctly recognize the LED strips and where to properly cut to ensure connections, it helps to have a simple guide for improved operations.
Cutting LED Strips
By Voltage:
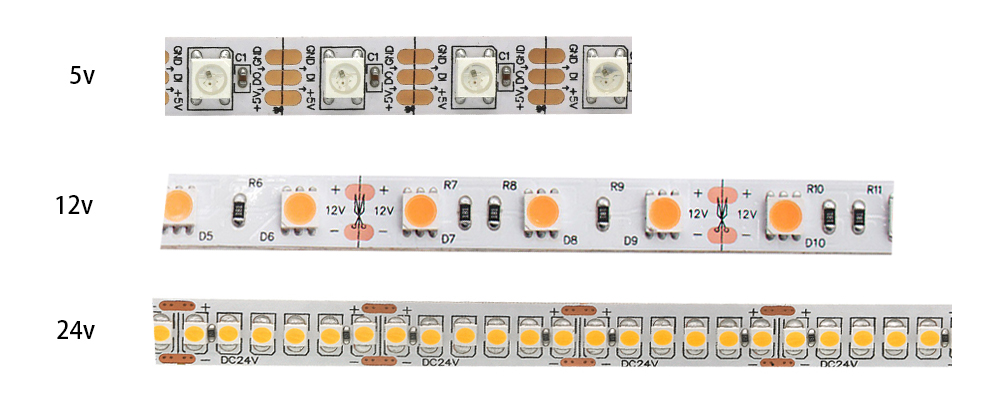
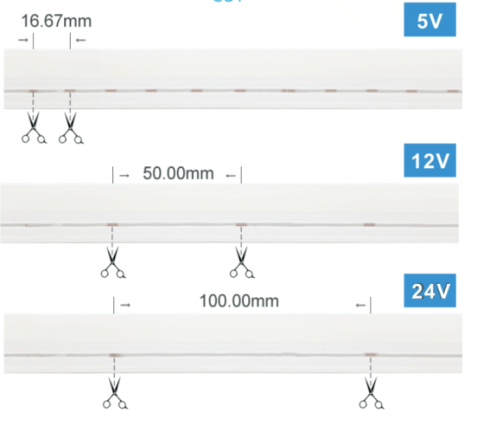
Each LED light strip is generally divided into 5V, 12V, and 24V segments with:
- 5V for a single set using a scissors mouth
- 12V for a group of three lights and a scissors mouth
- 24V for a group of six lights and a scissors mouth
When cutting, it is best to identify the position between each scissor. Simply press the scissors on the board to cut, careful to maintain a straight line at least with the position of the pad.
The picture below clearly illustrates the scissors position of 5V, 12V, and 24V strips light.
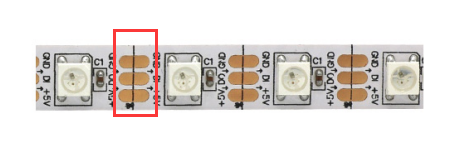
Please take particular care with the COB led strip. The COB LED Strip is a high-density product with numerous chips on the PCB. Therefore, it can be challenging to see the relationship between the voltage and the lamp beads for COB differentiated densities. For example, look at the position of the scissors for cutting in the image below:
The LED Strip can be divided by type:
These types include:
- SMD LED Strip
- COB LED Strip
- Addressable LED Strip
- Neon LED Strip
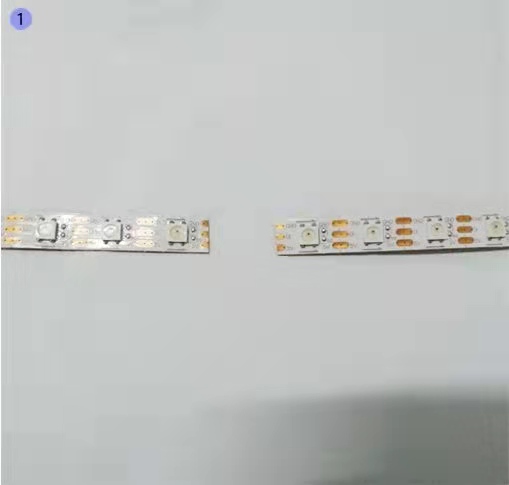
The SMD, COB, and Addressable LED Strips can be cut simply by clearly following the mouth of the scissors and cutting according to the line. As long as these LED strips are not cut off, there is no cause for worry.
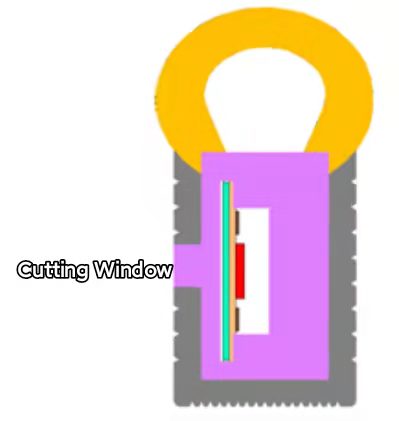
The Neon LED Strip is slightly different because of a thick silicone coating. That makes it necessary to locate the position of the scissors from the cutting window. It is not as obvious as the other LED strips, but can be viewed through the clipping window shown below:
How to Connect the LED Strip Light?
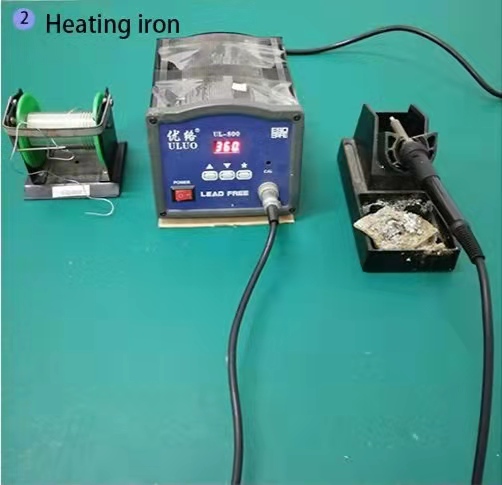
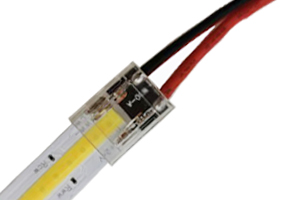
Electric Iron Welding:
The most common way for connecting LED strip lights is to weld iron. You measure out the length of the LED strip light you need, then cut the LED strip where needed using scissors or other implements. The various types of LED strip lights have different connecting methods, even though a soldering iron can do the work – the details may vary depending on the types of strips being used.
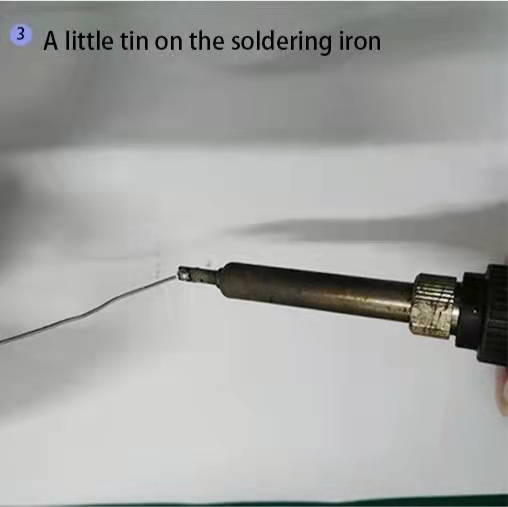
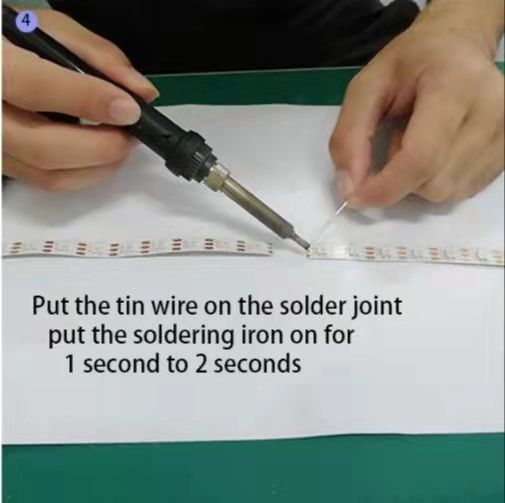
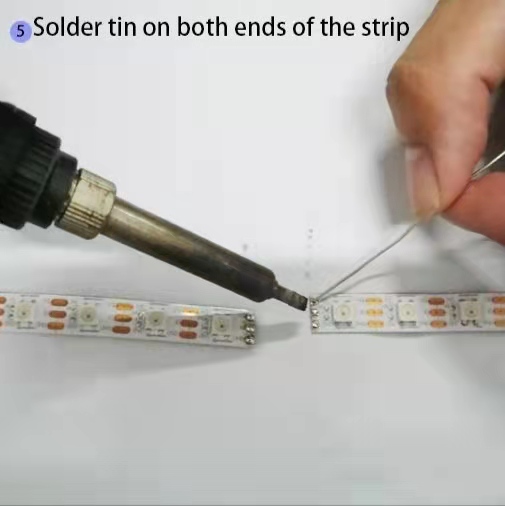
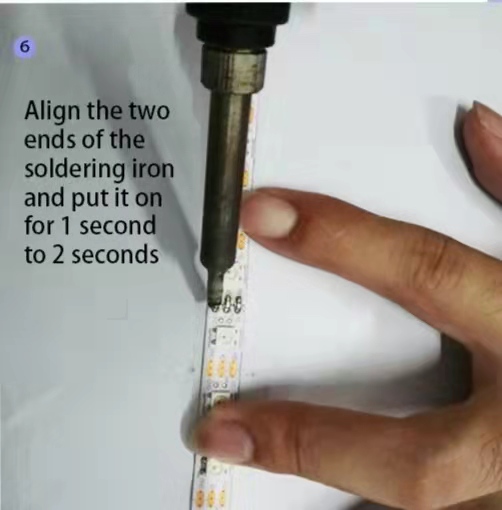
With IP20 non-waterproof SMD LED Strips, COB LED Strips, and Addressable LED Strips, the welding method is to solder the two ends of the cut wire and then splice the two ends together. Make sure you plug your soldering iron into a power supply that allows for a temperature of 350 degrees Fahrenheit. Next, stick on a bit of solder, place the soldering iron on the splice for 1-2 seconds, and then remove the solder to cool.
If you are using a waterproof LED Strip, you will need to scrape off the glue at the position of the pad that will be welded after cutting the strip. Then you solder it after leaking the material off the pad.
The welding method for the Neon LED Strip is different than the other strip lights. After cutting it at a suitable potion, solder the joints of the light strip, solder the wires, add a plug, and add a little bit of solder to the plug. Glue also helps increase water resistance. For a more detailed explanation of the specific steps, please view the YouTube video at the link below:
The advantage of connecting using an electric soldering iron is that the strip light can be connected firmly. The downside is that not everyone has an electric soldering iron handy, and even those that do may not be comfortable using the device by themselves. That is why solder-free joints were developed.
Solder-Free Connections (Connector Connections):
There is no need for soldering irons at all when using solder-free head connections. You can see the most commonly used connectors in the YouTube video below:
There are three types of connectors like this:
- Weld-free Connector
- Transparent Connector
- Buckle

1 – How to use the Weld-free connector:
- Cut the light strip to a suitable position
- Peel off the 3M adhesive tape about a ¼ of an inch
- Insert the two ends of the light strip into the middle top position and snap together
- Cover the cover
- Power on to test
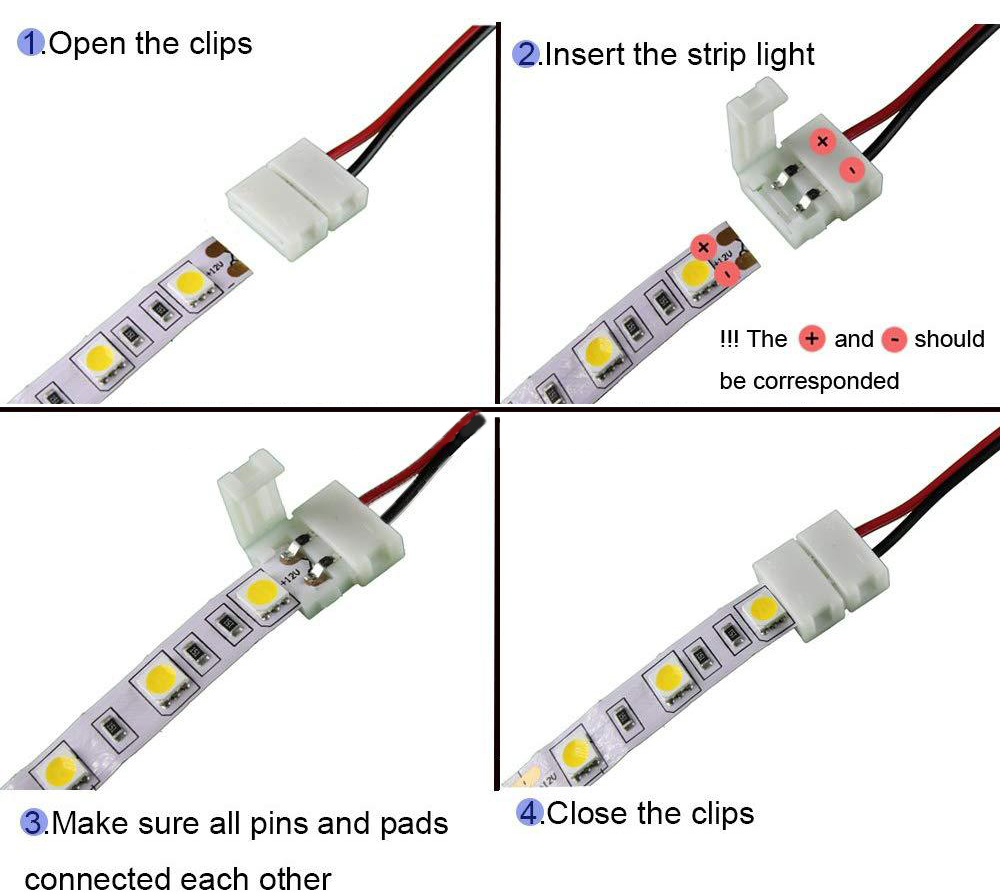
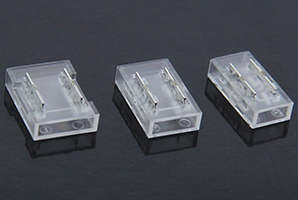
Advantages & Disadvantages of Press-Fit Linkers:
This is a traditional connector. After opening it, you can see that it has two wire clips to clamp the two pads of the light bar. This achieves an easy power-on effect after cutting and is exceptionally convenient for use.
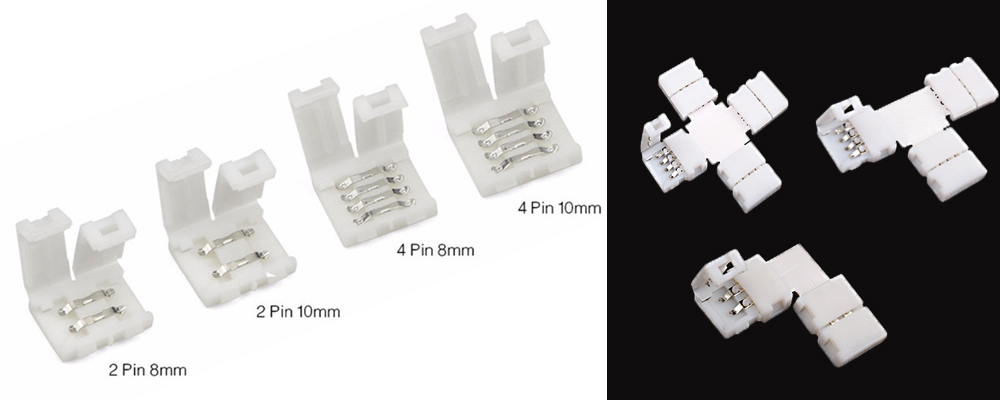
There are many kinds of solder-less connectors, including:
- Based on the number of PINs
- 2PIN
- 3PIN
- 4PIN
- 5PIN
- According to the shape, it is divided into
- Cross
- L-Type
- One-end Wiring
- Two-end Wiring
It is best to choose the appropriate model according to the type of connection being made.
There are three disadvantages:
- This connection is only suitable for non-waterproof strips
- When you cover it, you will probably end up covering one or two lamp beads. This can cause dark areas on the strips.
- Due to it being clamped inside, the external tension is not enough. The connection could fall away after long-term use.
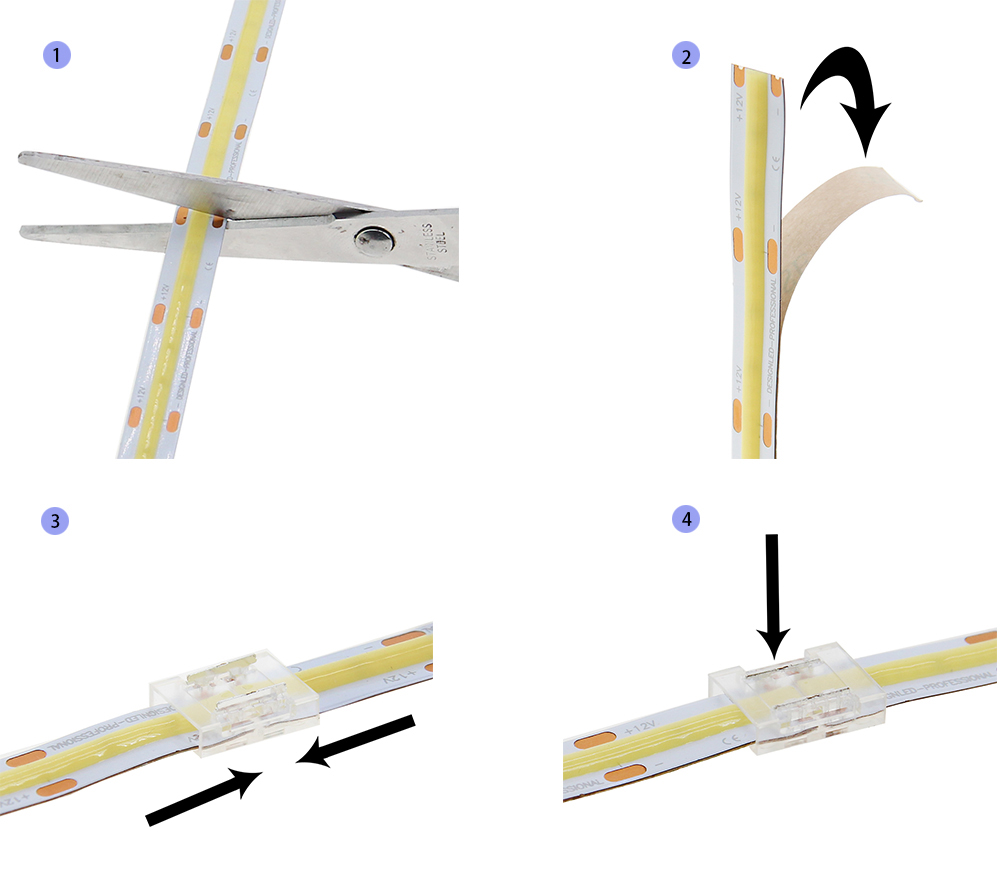
2 – How to use the buckle:
- Cut the strip to a suitable position
- Peel off the tape of the 3M adhesive about a ¼ of an inch
- Peel off the glue at both ends to expose the PCB board
- Insert the light strips at both ends into the middle top position and fasten them together
- Press the lid
- Power on to test
Advantages & Disadvantages of the Buckle:
The hippo buckle is suitable for waterproof strips, but it is relatively large. When using the aluminum slots, it will not fit into many smaller slots because of its size. This can cause some light blocking.
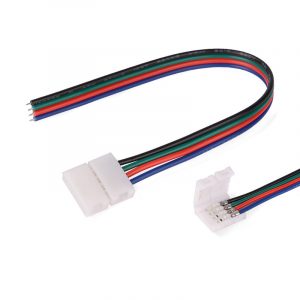
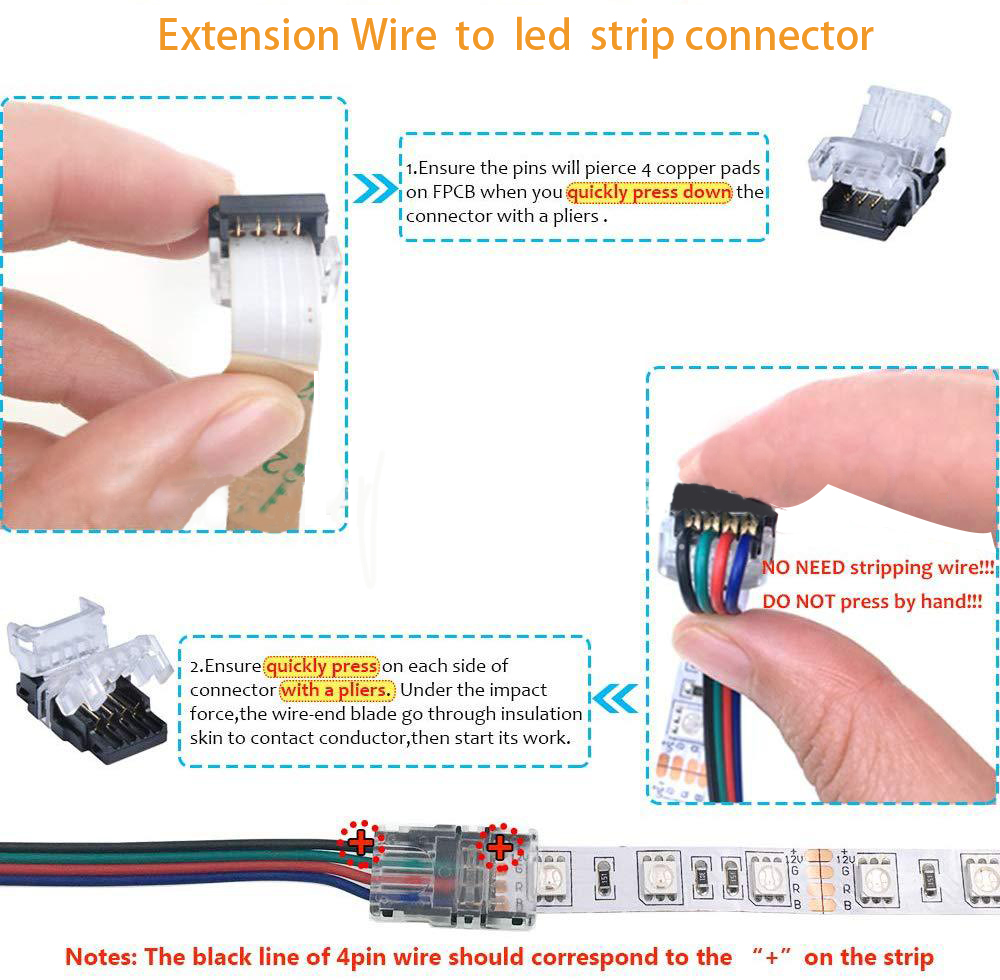
3 – How to use the new transparent connector:
This latest connection method is suitable for 2PIN conventional light strips.
- Cut the light strip to the proper position
- Peel off the 3M adhesive tape about a ¼ of an inch
- Insert the light strips at both ends into the middle top position
- Insert the pins to penetrate the PCB board
- Power on to test
Advantages & Disadvantages of transparent connectors:
The good part of using transparent connectors is that there are two snaps, which can easily penetrate the PCB board. Once connected, it is not likely to easily fall off. Another advantage is that the casing is transparent and does not block any light. The downside is these are not suitable for 4PIN, 3PIN, RGB, RGBW light strips – only for monochrome light strips.
Different Types of Transparent Connectors:
We can provide different widgets of 6mm, 8mm, and 10mm wide specializations. Plus the board can be connected with one end and the middle with wire.
Thanks very much for this useful explanation of the available connectors and their various strengths and weaknesses. It’s given me the confidence to start a custom LED project in my home!